Vanilla / Plugins / Modded / Hybrid
This guide will show you how to:
- Setup & Build a Desktop Server
- Upgrade Server with Files Online from Minecraft, Forge, etc.
- Upload the Files with Filezilla & Manage the MultiCraft panel
In the future, we'll introduce an automated service to install packs for you.
1) Modpack Version & Type
1.1) Plugins VS Mods
1.2) Versions
2) Desktop Test Server
2.0) Desktop Server
2.1) Download & Test Run
2.2) Optional (Plugins): If Using ONLY Plugins
2.3) Optional (Modded/Hybrid): If Using Mods [and Plugins]
2.4) Install Mods OR Install a Modpack
3) File Management & Uploading
3.1) Upload via Filezilla
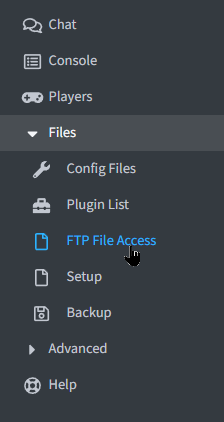
3.2) Upload via Server Panel [wip]
3.3) Targeting the correct ServerJar
1) Modpack Version & Type ↓↑
1.1) Plugins VS Mods
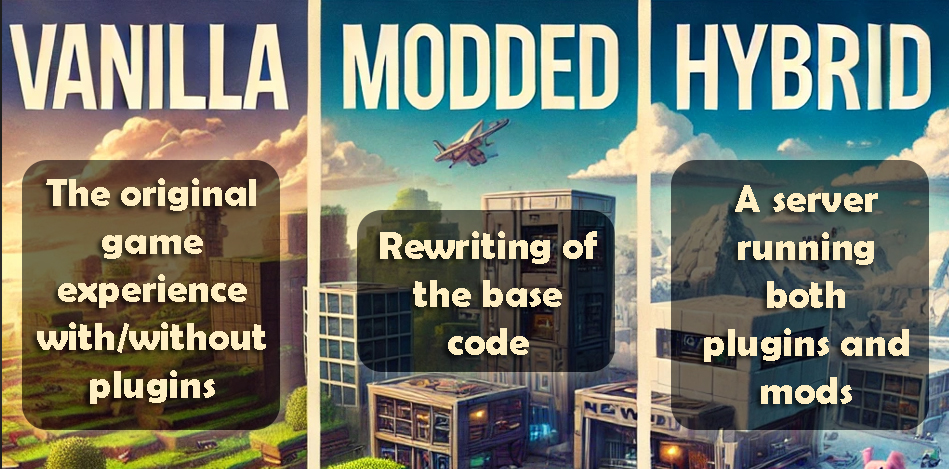
A server will be one of the following three server types:
- Vanilla: A server with or without plugins is sometimes referred to as a VANILLA server since nothing is modified on the client's end.
~ Plugins are non-game-modifying adaptations to the server that assist players and protect the server. They also allow mini-games and much more; and are typically lighter-weight compared to mods. - Modded: A server with heavy modifications to the base code is a "MODDED" server.
~ Mods add blocks to the game and change how the game works to the core. - Hybrid: Lastly, when a server is set up for both plugins AND mods, it is referred to as a "HYBRID" server.

1.2) Versions
Take note of the version of Minecraft that your server/plugins/modpack will be running on.
e.g. 1.12.2, 1.16, or other variations.
If you will be using plugins or mods, which versions are commonly supported?
(You can look through CurseForge and view the most popular mods' available versions, similarly to Spigot for plugins).
2) Desktop Test Server ↓↑
2.0) Desktop Server
Create a new folder on your desktop and label this your new server
2.1) Download & Test Run
a) For the most recent version released, visit Minecraft's website for their recent server Loader/JAR download.
b) For previous versions, Google is your friend. "Minecraft Server [your version] download".
c) Once you download your minecraft_server.jar, we will want to move that to our newly labeled Desktop server folder.
d) Now we need to create a start script and run it to start the server in a desktop environment.
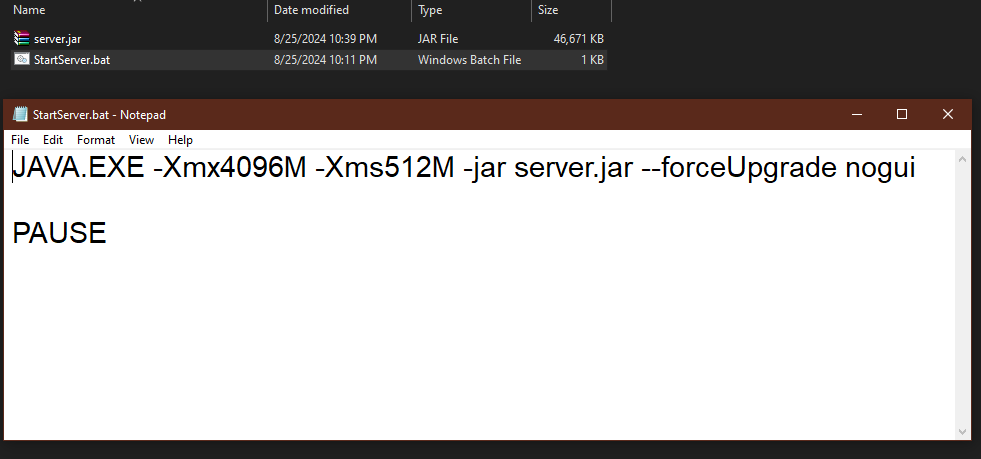
d-1) Create a new text file in your Desktop server directory and name it something like StartServer.bat; Confirm the file type change.
d-2) Right-click & edit the file and insert a startup script then save. Afterward, double-click to run the file.
d-3) Our preferred script is as follows:
JAVA.EXE -Xmx4096M -Xms512M -jar server.jar --forceUpgrade nogui
PAUSE
RAM Note: You may also need to adjust the -Xmx value if you need more or less RAM requested based on your system's capabilities.
Naming Note: The JAR name will likely need to be changed here depending on your server type and version.
[progress so far]
e) It should fail and request that you accept the EULA (terms & agreement). Close the console window. Open the eula.txt file and change FALSE to TRUE, save & close.
f) Run the minecraft_server.jar with the BAT file again.
g) If it says "Done" at the end, you have started your server successfully. (This may take a minute)
g-1) You should have a directory full of files now as well.
h) After confirming it works, stop the server (close the terminal, type "y" to confirm & hit enter); Then make any other necessary changes.
If you are not going to add any mods or plugins, you are ready to upload to your server: [Click Here]
2.2) Optional (Plugins): If Using ONLY Plugins
(SKIP THIS STEP IF YOU ARE USING MODS)
a) If you would like plugins, you can get a Loader/JAR that allows this:
a-1) The most common loader for v1.7 - 1.12 is Bukkit.
a-2) The most common loaders for v1.12+ are Spigot & Sponge
a-3) (You may want to do some research on which of these is best for you)
b) Move the new Plugin JAR file to your Desktop server folder
c) Then edit the startup script BAT file now to read identical to your new Plugin JAR file.
c-1) e.g. JAVA.EXE -Xmx4096M -Xms512M -jar spigot-1.21.jar --forceUpgrade nogui
d) Run your startup BAT file; If it succeeds, you will have a new /plugins/ folder.
d-1) We can further test this if you see feedback after running /plugins in the console.
d-2) Add a few plugins at a time and test for conflicts.
2.3) Optional (Modded/Hybrid): If Using Mods [and Plugins]
(SKIP THIS STEP IF YOU ARE NOT USING MODS)
Download & Install Forge
a) Download your chosen version of Forge and get the Recommended Installer
a-1) Don't get tricked by the adfoc.us ads; Hit SKIP in the top-right corner
b) Run the Forge Installer with Java. Choose Install Server, and choose your fresh Minecraft Server Directory to merge into.
b-1) It will warn that files are already here, this is just fine.
c) Once done, you will have two new start files "run.bat" and "run.sh"; Both should be compatible to run.
c-1) If everything works, you will see a "Done" message at the end.
Enable Plugins & Mods
You will need a specially designed mod-loader to allow plugins to play nice with Forge.
Disclosure: This does not always work smoothly and will advance your diagnosing needs from time to time.
We can vouch for Arclight and Magma & do NOT recommend Mohist. (Essentials Disclaimer)
Research hybrid options, and make backups often!
(A great list of mod-loaders for each MC version)
a) Download the correct version of your selected mod-loader into your Desktop server directory.
b) Edit the original startup BAT file to now look for the new mod-loader
b-1) e.g. JAVA.EXE -Xmx4096M -Xms512M -jar arclight-forge-1.20.4-1.0.4-80ec5df.jar --forceUpgrade nogui
2.4) Install Mods/Modpack/Plugins
Now, you are ready for your mods and/or plugins!
Remember to add single plugins or mods about 1-4 at a time into their corresponding mods/plugins folders.
(If anything conflicts it will be easier to diagnose in smaller numbers)
Once you're satisfied with the outcome of your Desktop server upload it all to the server and test it out!
(Do not overwrite the server.properties file, as this will override the necessary Server-IP and Server-Port values).
3) File Management & Uploading ↑
3.1) Upload via Filezilla
The Filezilla client makes file management a lot easier than many website server panels can provide.
Note: Do not drag server.properties away or delete it from your main directory.
If you do, you will need to replace the Server-IP and Server-Port properties with what is displayed on your Server Panel
a) Backup your current server in one of two ways:
a-1) Being mindful of how much storage your server allows, create a new folder named something like "!OldDefaultServer", and drag all* files here.
a-2) OR Drag all files to a Backup folder on your desktop named something like "!OldDefaultServer".
b) After backing this up, drag the entire contents of your Desktop server directory to your SlimeServers directory in Filezilla.
b-1) You can speed up the upload process by increasing the simultaneous connections in Edit > Settings > Transfers. (A safe value tends to be between 3-9 depending on your internet)
c) Once they are all complete, you need to target the correct JAR in the Server Panel.
3.2) Upload via Server Panel
[WIP]
3.3) Targeting the correct ServerJar
Depending on which type of server you are running will depict which JAR we select.
For the most part, we will use customjava7-21.jar.
a) Sign in to the SlimeServers web Server Panel. On the main page, change the JAR file via the dropdown.
a-1) (You can search via keyword instead of scrolling).
b) If you are using Forge alone (only modded), then you will want to select the appropriate "Forge #" variant (e.g. Forge 1.20.1)
c) If you are using Vanilla/Plugins/Hybrid servers, you will want the "Custom Java #" variant.
c-1) The number corresponds to the JAVA version, use the conversion table below to find the correct option
d) Start the server & test the connection!
Java Versions Required for Each MC Version
MC 1.7.10 = Java 7 (8 is compatible)
MC 1.8 - 1.15 = Java 8
MC 1.16 = Java 8 (11 is compatible)
MC 1.17 - 1.17.1 = Java 16
MC 1.18 - 1.19 = Java 17
MC 1.20+ = Java 21
[Back to top]

